
Chapter 2: The Sinister Secret of Saltmarsh
A haunted house sits on a bluff near the town of Saltmarsh. For years it has sat derelict watching mournfully over the waters of the Azure Sea. Tales are told on dark nights about what ghosts roam its dusty halls left behind after its owner, the old alchemist, disappeared. There are rumors about those that have gone to investigate it, they either come back and talk of horrors that they saw or they don’t come back at all.
This adventure was originally published in 1981 and was designed by Dave J. Brown and Don Turnball. It is the first of three adventures in Ghosts of Saltmarsh that are narratively tied together and to the town of Saltmarsh. This is where the campaign starts. This is the only adventure that my party walked to, after this it was all about sailing. The book breaks the adventure into two parts, but I see it as three. They are the house, the smuggler’s lair, and the Sea Ghost. By the end of the Sinister Secret of Saltmarsh, the characters will be third level.
There are three adventure hooks provided to get the characters to go to the old alchemist’s house. These hooks are very focused on the house being haunted and the potential of finding treasure. If you have a party of players that have more beer and pretzel mindset, these are fine adventure hooks. I was looking to create a more story-based campaign with characters that were looking out for the greater good of their community. I’ll discuss the hook I used in the What I Changed section below.
The house is full of low-level monsters, natural hazards, and some clues to what lies beneath the house. If the characters are smart, they’ll take the time to go through the different floors of the house to find clues that can help them later. Plus, there is an important NPC bound and gagged on the second floor.
The smuggler’s lair is in the cellar of the house and some natural caves that open up onto the Azure Sea. The characters will encounter the smugglers led by their leader Sanbalet down here. They also might run into the original owner of the house in the form of a skeletal alchemist and his skeleton minions. Here is where the combat can get a little rough. The characters may have to make a tactical retreat at this point before clearing the smugglers’ lair. This will ruin any element of surprise until the final section of this adventure.
Finally, the characters will assault the smugglers’ ship, the Sea Ghost. The characters will be second level, which will give them more abilities and resources to draw upon (not to mention more hit points). The Sea Ghost is not at the house when the characters start the adventure, which will allow them to plan this assault. For new players, you will want to stress the importance of planning how they will deal with the Sea Ghost when it returns. More experienced players will see the opportunities to use subterfuge to enhance their plan.
The original adventure was written at a time when there were not many character races to choose from, and none that were available had any kind of water breathing abilities. This comes through quite a bit when you read the chapter, especially during The Sea Ghost section. If your players have created characters that can swim, breath underwater, or do both, it will give them a tactical advantage that the original writers did not see coming. This will also allow for more variety of the plan that the players can put together. There are suggestions in the adventure for how many rounds it will take for the obvious choices that the characters will come up with, but none for water breathing characters. Make sure you take time to decide how you will deal with plans that include such contingencies.
This adventure starts sort of basic with a dungeon crawl in a haunted house, which might have been more exciting, but I had recently run two adventures that had taken place in haunted houses. The smugglers’ lair required more tactical thinking from my players, which was not their strong suit at that time. The real gem of this adventure is the assault on the Sea Ghost. Depending on the players’ plan, this could include role-playing, subterfuge, and combat. It is very important to give your players the opportunity to plan their assault on the Sea Ghost. There is built-in time in the adventure from when they clear the house to the ship’s arrival. Let your party use this time wisely. The raid on the Sea Ghost is one of the most fun combats I have ever run. My players had come up with an excellent plan that only succeeded because of a failed skill check.
Sinister Secret of Saltmarsh is a very good start to the Ghosts of Saltmarsh campaign. A good session zero will lay the foundation for this adventure and provide hooks that will start the campaign that you want to run. This adventure also sets up the hook that will lead the characters easily to the next adventure, Danger at Dunwater, without much effort from the DM.
Resources

Note planted by Ned in the smuggler’s lair.

The handout from the original Sinister Secret of Saltmarsh from 1981.
How it Played
Once they had decided to investigate the haunted house, the party went straight to it. They did very little investigation around the house, so those encounters did not happen. As soon as they entered the house, they made a beeline straight for the Living Area and discovered the secret trap door. The description says that as soon as the characters get within five feet of the trapdoor the Magic Mouth is triggered. I had it trigger only once the characters opened it, which they did immediately. They loved the booming voice with its warning, they proceeded to keep opening and closing the trapdoor to hear it. This eliminated any chance for surprising the smugglers in the lair below.
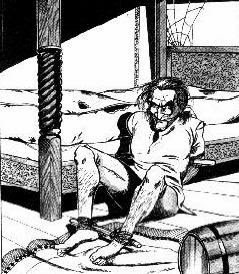
Amazingly, they decided to check out the whole house before going down into the lair. They went through every room and checked every nook and cranny except the Crumbling Bedroom (area 14). You know, the one with all the clues. They rescued the gagged and bound Ned Shakeshaft (area 15) and returned his missing clothes and equipment they found in the Box Room (area 17).
Once they had exhausted all of the encounters in the house proper, they headed down into the smugglers’ lair. Two of the characters argued all the way down the stairs into the Cellar (area 21) about who should go first. If they had not triggered the Magic Mouth, there was no way that they were not going to be detected by the smugglers in the Cellar. Upon opening the door, the smugglers attacked taking one of the PCs all the way down to one hit point. With Ned’s help, the characters were able to clear the Cellar, the Skeletons’ Room (area 23), and Laboratory (area 24). They ransacked Sanbalet’s Private Quarters (area 22), then made a tactical retreat back to Saltmarsh.
After a long rest, the characters returned to the haunted house to finish clearing out the smugglers. This time the smugglers set a trap for the characters in the natural caverns. The characters found themselves surrounded, but were able to fight their way to victory. From the couple of smugglers that they captured, they learned about the operation and about the Sea Ghost, which would be returning in a couple of weeks.
The original adventure from 1981 included a handout that the players find while they search through Sanbalet’s room. It is the code the smugglers use to let the crew of the Sea Ghost know it is safe to land. In the updated version, there is no handout, and the code is solved with a skill check. I am not a big fan of solving mysteries and interactions with dice rolls, so I found the handout online (see it above). This did not go over very well with my party and they had no idea what the cryptic symbols on the handout meant, so I had them solve it with a die roll (I get the irony of what happened).
The most important story element of the combat on the Sea Ghost is the finding of the lizardfolk on it. Hopefully, your characters don’t kill the lizardfolk during the assault, otherwise this makes the next adventure a little more complicated. On the positive side, they could end up with a pseudo-dragon.
The Problem with Room 14 - Crumbling Bedroom
The problem with this room is that players do not go into it. It has clues to how the smuggling operation signals the Sea Ghost, but it requires the characters to make a close investigation check at the window. The flavor text gives the players no reason to go inside the room and actually gives them every reason to close the door and walk away. This makes the discovery of how the smugglers’ operation work very awkward.
I suggest the following changes to the room. Add a chair next to the window with a small barrel full of lamp oil. This will give the characters a reason to enter and investigate the room. I would change the flavor text to the following:
This mostly empty bedroom holds a single chair and a small barrel next to the window. Peanut shells are strewn across what looks to be an unsafe floor; some of the floorboards are missing and others are partially dislodged.
Now the players have a reason to go into the room and investigate instead of seeing that there is nothing in the room and walking away.
Sea Ghost
Also known as Monkey’s Carnage.

The Sea Ghost made from foam core and clear cabinet liner.
I thought about what would happen with the Sea Ghost quite a bit. At one point I was going to have the town council take it from the players and give them enough money to buy a smaller vessel, one that would not require a crew. In the end, I decided to let them keep it with no strings attached. It was the best decision of the campaign.
The players became very attached to the ship because they earned it. Their plan to capture the ship went well and is still one of the most fun combats I have ever run. It is also a money sink for all the loot that the players earn throughout the campaign. They have to supply the ship, pay their crew, and do general maintenance. They never got into upgrading the ship, but then I never gave them much chance to do that; there was just too much to do.
I made a skill challenge out of finding the crew. Each of the players gave me a description of how they would try to recruit. Through their skill check rolls and role-playing, they found the members of their crew. Between sessions, I found pictures on the internet and added the names. This became part of the campaign packet that would grow with all the handouts.
They came up with a crew rotation for the jobs and that is a staple in my DM notes. It is very useful to know where everyone is on the ship throughout the day, especially during random encounters.

I created a version of the ship that we could use in our game out of foam core, a scaled printout, and clear cabinet liner. This gave me something I could put in the center of the table of each of our sessions. The original version of the Hold level did not include the secret doors. The session after they discovered them, I made a new version that included the secret compartments and did not include the cargo in the hold.

Team Daddy Issues.
Mac – Gnome Bard; Hired by Eda to find out what happened to the tabaxi that washed-up-dead onshore in slave garb
Whisper – Genasai Druid; Witnessed the destruction of half of the Saltmarsh fishing fleet by Hood’s Gloom
Tidal – Genasai Sorcerer; Former crew member of the Jolly Victory (owned by Gellan Primewater). Knows of the Endless Nadir and the Scum Pirates
Amar – Human Paladin; Former smuggle (Spirit of the Whale) – is trying to protect Wind
Wind – Tabaxi Rogue; Disguised as a human and the Scarlett Brotherhood is looking for it because he stole a book from them with secret text in it
What I Changed
The hook I used was:
Eda Oweland comes to Mac and tells him that a tabaxi washed ashore dead this morning near the Empty Net. This is the third tabaxi to be found dead in Saltmarsh in the last couple of years under suspicious circumstances, and there was a fourth killed in a bar fight recently. The tabaxi that washed up on shore was part of a pair of adventurers that showed up in town a couple of weeks ago with intentions of going to the old Alchemist’s House looking for his stash of gold.
The adventuring pair stayed the night at the Empty Net after arriving by boat from Seaton. The tabaxi went by the name of Siren. The other adventurer was a human named Tomas Wildthorn, who wore plate mail, carried a shield, and wielded a long sword. The tabaxi was bound and wore clothing that looked like slave garb.
The other tabaxi that were found dead were: an unknown found by children tortured to death in Crab Cove; one named Sizzle, who was found pickled in a barrel on the docks near one of Gellan’s ships; and Ruby killed by Ned Shakeshaft in self-defense in a knife fight at the Empty Net.
Wind had plenty of interest in investigating this killing because he was sure that he was the one that was being sought by some shadowy group. Wind’s benefactor had been hiding him under a Seeming spell to look human. The players knew that Wind was a tabaxi, but the characters did not except Amar.
I had Ned being an unknowing member of the Scarlet Brotherhood. He was hired by them after he killed Ruby in a bar fight at the Empty Net. The Brotherhood placed him in the mansion to plant evidence for the characters to find to incriminate Gellan Primewater. The Scarlet Brotherhood wanted to remove Gellan from the town council and try and place someone they could control in his place. I was also going to have Ned betray the party, but then the adventure happened.
Ned Shakeshaft
As the DM, I took advantage of every situation I could to have Ned further the Brotherhood’s plan. Ned planted evidence in a book as he got it down off the shelf (I rolled a 19 for sleight-of-hand) that Mac could not reach. I did the roll on the sly so that Mac was none the wiser. The evidence against Gellan was starting to accumulate. During the tactical retreat back to Saltmarsh, Mac went to the Empty Net and confirmed Ned’s story with Kreb Shenker about his killing of Ruby. The next day, Ned placed receipts from the Iuz slave market with Gellan’s name on it on one of the bodies in the smugglers’ lair.
To my surprise, Ned became a good guy. This was a result of the characters’ actions. When they found him, they immediately gave him his belongings and did not play games with him. They treated him like an equal and shared treasure when they found it. The biggest change happened when Amar healed Ned in the middle of a battle without being asked and without expecting anything in return. It was a moment that affected Ned. I remember it clearly because as the DM I was not expecting a character to help an NPC in such a selfless way. I had thought of Ned as a mercenary, selling his sword to anyone that would pay. He had never been treated as an equal, but always as a disposable tool. Except for Wind, the party loved Ned right from the get-go. Their trust may not have been given wisely, but it spoke to how the party worked as a whole.
Remir
I put Amar’s brother, Remir, on the Sea Ghost. I made that decision once I knew the backstory about Remir. He was the good brother when Amar was a smuggler, then he became the bad boy after Amar left that life and became a paladin. Remir was reacting to his brother and trying to get out of his shadow by being different. There was also the fact their mother seemed to like Amar more when he was a smuggler. Remir became the favorite when Amar walked away from that life and Remir took it up. This would play into the story later.
As they were planning the attack, Amar decided that he would disguise himself as his brother. This was a decision that would have disastrous results, but when the skill check to disguise Amar was made, the roll was a natural one. Everyone could see that it would not work. So, Amar just tried to make himself as indistinguishable as possible.
The plan had Tidal, Amar, and Wind disguise themselves as smugglers and row out to the Sea Ghost. Meanwhile, Mac and Whisper would swim up to the ship and sneak aboard. Whisper changed his shape into a monkey and climbed up into the rigging and set it afire with alchemist fire that Wind had made during the downtime. This was a distraction that would keep part of the crew occupied while the rest of the party started their attack. Whisper then dropped onto different smugglers causing havoc and death wherever he went.
Wind’s Backstory

Ghesh/Thava (Ghesthava) “Wind” Linxakasendalor
Wind apprenticed to Scarlet River University in the capital of Keoland. After years at the university, one night you fell asleep in the library. You awoke to hear voices coming from the back of the great room.
You overhead two men talking about a secret society that they referred to as the Brotherhood. They were talking about one of their agents, the Bishop, in Saltmarsh making good headway on the plan to take over the kingdom one town at a time. One of the men wrote something into a book and placed it on the shelf. A woman joined the two men and that was when you decided to leave the library.
The next day, you went to the library and took the book that the men had been writing in; hoping to uncover their plot. You took the book down to find it was a treatise on raising and breeding cattle. The chapters always started on the left page of the book, this left blank pages randomly throughout the book. Each of those blank pages had writings on them. Unfortunately, the writing was in some sort of code that you could not decipher. You copied one of the pages down in hopes of decoding it and planned to return the book to the library. There was a strange symbol that, no matter how hard you tried, you could not reproduce. As you approached the library, you recognized the three figures from the night before entering the library ahead of you.
You took the book and what you knew to your mentor, the wizard Itorn. Itorn suggested that you not go back to the university. You decided to go to Saltmarsh and try to figure out who the agent that lived there was. Itorn had a friend that lived there named Reaghal Deepwell, who could give you a place to live. Taking only the book and the clothes on your back you went to the docks, where you met Amar and negotiated passage to Saltmarsh on the Emperor of the Waves.
During the passage, you were swept off the deck of the Emperor and nearly drowned. Amar dove into the sea to save you and the storm suddenly stopped and the seas became calm. You were both returned to the ship on the crest of a wave. Amar left the ship with you and he went to the Temple of Procan and has become a paladin. The Emperor disappeared at sea on its next voyage.
Reaghal has been keeping you hidden by casting the spell Seeming on you to make you appear human. The spell lasts eight hours at a time.
Contacts in Saltmarsh:
Reaghal Deepwell – Human alchemist (Illusionist) and owner of the Cauldron and Tube on Sharkfin bridge. You rent a room above the shop and pay for it by working for Reaghal in the shop two days a week. Each day Reaghal casts Seeming on you so that you look human (lasts 8 hours – he can cast it twice a day). Only Reaghal and Amar know that you are a Tabaxi
Eliander Fireborn – Council member (loyalist)
Eliander was injured while battling an owlbear and now walks on a finely carved wooden peg
Eliander has the most extensive library in all of Saltmarsh
He is known for being fully literate in Common, Dwarvish, Gnomish, Elvish, and Halfling
Eleanor Loveage – A chemical dealer in the Styes (town to the west, beyond the Hool Marsh)
Keledek the Unspoken – The town’s very odd mage is a regular at the alchemist shop.
Captain Xendros – (Location 7); Tiefling and Faithful Quartermaster of Iuz. Frequents the shop and is constantly buying strange ingredients.
Aftermath.
During the fight to take the Sea Ghost, Amar threw Bloody Bjorn overboard. This was a cool moment that suddenly had everyone shocked because Bloody Bjorn was wearing chain mail. He sank straight to the bottom of the Azure Sea. The first mate came back to haunt Amar as a deep scion (GoS p. 233).
During the fight, Remir did nothing until the very end when he attacked and killed Captain “Snake Eyes” Sigurd. Remir returned to Saltmarsh before the characters and took credit for uncovering the smuggler/slavery ring. He also exposed Gellan as a slaver. He used his newfound fame made him a local hero.
